The hand making process
After stretching a piece of lightweight pure silk onto my frame, I use a ‘fading’ pen to mark the position of each silk square to help me draw the borders using black gutta resist outliner.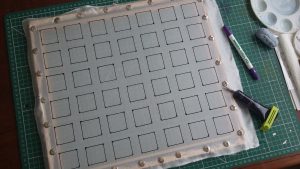
Once that’s dry, I paint each sil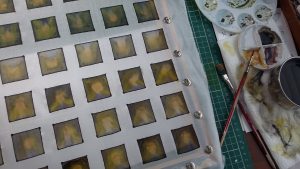 k square with water based silk paint to paint, allowing the colours to run into each other and give a moody quality to the hedges and road with a sunrise/sunset effect in the centre.
Then I paint the edges of all the squares as quickly as possible to avoid any drying marks.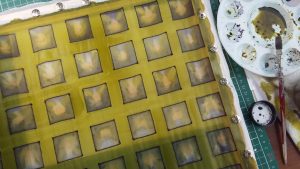
Once that’s completely dry, I go to work with the black gutta again – hand drawing the ‘hedges’ onto each one.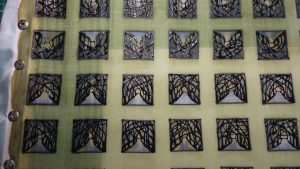
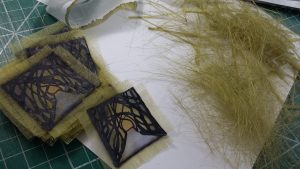
Hours later I can remove the silk from the frame, and cut out the squares, carefully trimming each one and fraying the edges to give a softer effect.
Now I get to make up the cards that I’ve designed and printed. To give the shimmery and mystical effect, I attach a piece of gold foil to the front of the card, to sit underneath the piece of hand painted silk.

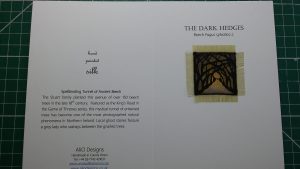
Now I’m ready to add a bit of colour to the title and a bit of glitter to highlight the foreground and tree branches.

Finally, I pack each card with its green/gold metallic envelope into a cello bag, ready for sale. You can see how much work goes into producing each card and how each is unique.